.svg)


🎯 Quick Answer
There are five ways to install OpenClaw, depending on your operating system and how much terminal you're willing to tolerate.
The fastest path on any platform is Atomic Bot — a desktop app for macOS and Windows that handles the entire installation in a few clicks. If you just want OpenClaw running as quickly as possible, download it at atomicbot.ai and skip ahead to the Atomic Bot section.
For everyone else, this guide walks through CLI installation on macOS, Windows (via WSL2), Docker, and Ollama integration for local models. If you're not sure what OpenClaw actually is, our What is OpenClaw deep-dive covers the architecture, agent loop, and skill system.
What is OpenClaw?
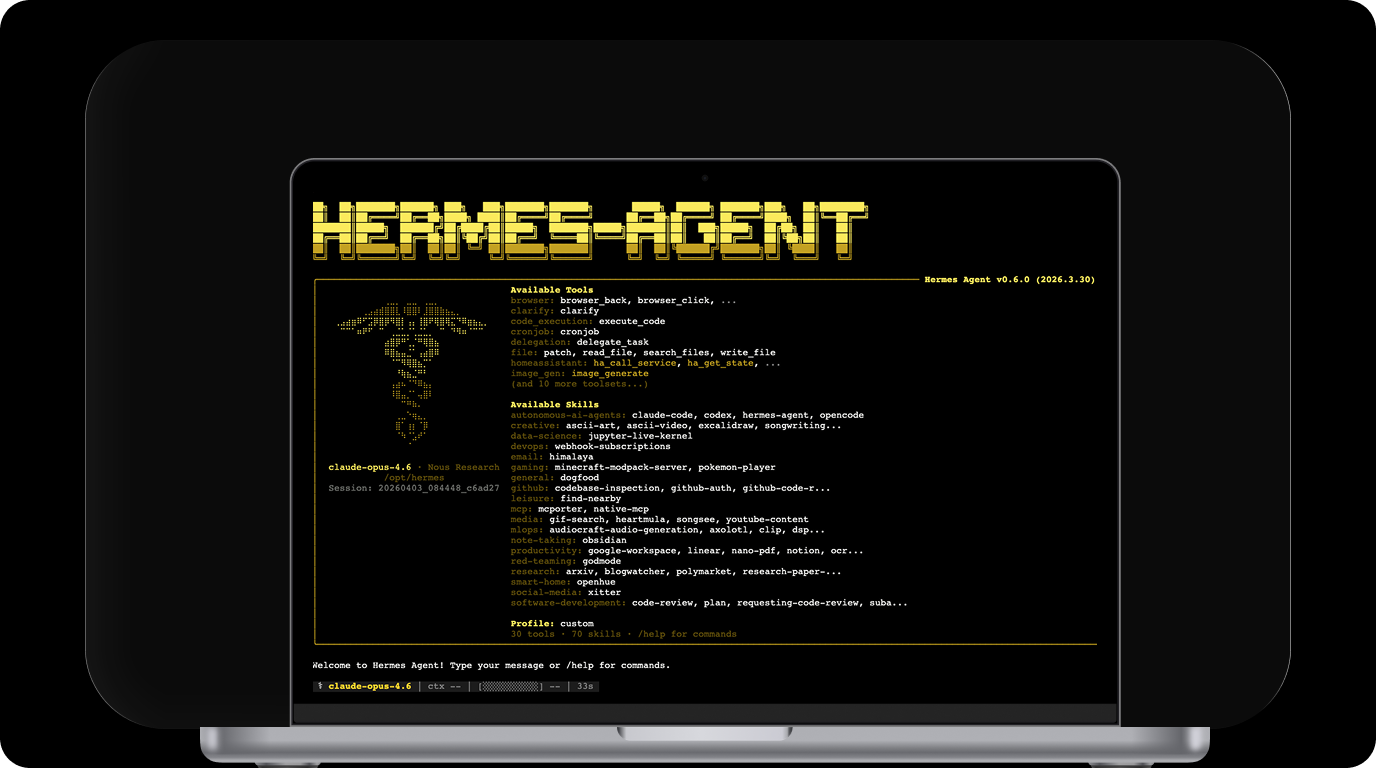
OpenClaw is an open-source AI agent gateway. It's a piece of software that runs on your computer and acts as a bridge between you and an AI model like Claude, Gemini, or GPT. You interact with it through messaging apps you already use — Telegram, WhatsApp, Discord, Slack, or email — and it carries out tasks on your behalf.
What makes it different from something like ChatGPT is that OpenClaw can run on your machine and complete tasks proactively, which makes it more powerful than a simple AI chat. Learn more about the difference of AI agents and chatbots.
It's also not tied to a single AI provider. You configure which model you want to use during setup, and you can switch providers at any time without losing your data or reconfiguring your skills.
People use OpenClaw for things like email triage, calendar management, GitHub monitoring, research automation, and multi-channel customer support. It's one of the fastest-growing open-source projects on GitHub right now, with over 300K stars and hundreds of thousands of monthly installs.
The catch is that setting it up through the command line takes some effort. There's a multi-step installation process, a configuration wizard, channel setup, and a handful of things that can go wrong along the way. It's all documented, but it's not something you'd hand to someone who's never opened Terminal before. That's actually the problem Atomic Bot was built to solve — but more on that later.
💻 OpenClaw System Requirements
OpenClaw requires Node.js 22 or later. The official installer script detects whether Node is present and installs it automatically, so this isn't something you need to handle in advance unless you're using the npm/pnpm method directly.
macOS and Linux are supported natively. Windows users need WSL2 (Windows Subsystem for Linux) — OpenClaw relies on Unix shell scripts, file system watchers, and process management tools that don't exist in native Windows. WSL2 gives you a full Linux kernel inside Windows with near-native performance, and it installs with a single PowerShell command.
How much hardware you need depends entirely on whether you plan to use cloud AI models or run local models through Ollama.
With cloud providers like Anthropic or OpenAI, OpenClaw is surprisingly lightweight. It's an orchestration layer, not an AI model — the gateway process is mostly I/O-bound, waiting on the model's response and then dispatching tool calls. A modern laptop with 8 GB of RAM handles this comfortably. CPU pressure only becomes noticeable during browser automation sessions or when multiple agents run concurrently.
But local models through Ollama are a different story.
Ollama needs enough memory to hold the model weights plus a context window of at least 64K tokens (the minimum OpenClaw recommends for agent tasks). In practice that means 16 GB of RAM for smaller models like Qwen 3.5 9B, and 32 GB or more for something like Qwen 3.5 27B.
On Macs, Apple Silicon's unified memory architecture makes local inference particularly efficient because the GPU and CPU share the same RAM pool, eliminating the transfer bottleneck that slows down traditional hardware.
For storage, the OpenClaw installation itself takes about 2–3 GB. After that, growth comes from session logs, memory files, and (if you use Ollama) model weights — which range from 4 GB to 40 GB per model depending on parameter count and quantization.
If you plan to keep several models downloaded, 512 GB of disk space is a comfortable baseline.
🖥️ Mac Mini as a Dedicated OpenClaw Server
The Mac Mini has become the community's default hardware recommendation for always-on OpenClaw hosting, and the reasons are practical rather than aspirational.
- Apple Silicon draws 5–7 watts at idle, which works out to roughly $1–2 per month in electricity at typical US or European rates.
- M-series Mac Minis produce zero fan noise at low load.
- The unified memory architecture gives local AI models significantly faster inference than discrete GPU hardware at comparable price points.
- And macOS launchd integrates natively with OpenClaw's
--install-daemonflag, so the gateway starts automatically after boot, crash, or power outage without any extra tooling.
For people using cloud APIs (Anthropic, OpenAI, Google), the base Mac Mini M4 with 16 GB of unified memory is the best value in 2026 — it handles the OpenClaw gateway, multiple messaging channels, and browser automation without strain.
If you want to eliminate API costs entirely by running local models through Ollama, aim for 24 GB or 32 GB. With 32 GB, models like Llama 3.3 70B (quantized) run at comfortable conversational speeds. With 16 GB, smaller models like Qwen 3.5 9B run very quickly.
Setting up headless operation
After installing OpenClaw using any CLI method from this guide, you don't need a monitor, keyboard, or mouse connected to the Mac Mini. Configure these settings once and the machine runs itself:
- Enable SSH: System Settings → General → Sharing → Remote Login: On
- Enable auto-login: System Settings → Users & Groups → Login Options → set your user account to log in automatically
- Restart after power failure: System Settings → Energy → "Start up automatically after a power failure"
- During onboarding, use the
--install-daemonflag so the gateway registers as a launchd service
With these four settings, the Mac Mini recovers from power outages and restarts the OpenClaw daemon without any manual intervention. You manage everything over SSH (ssh username@mac-mini.local) or through the web-based Control UI at http://mac-mini.local:18789.
Remote access from outside your network
To reach your OpenClaw instance from outside your home without opening firewall ports, install Tailscale (free for personal use) on both the Mac Mini and your phone or laptop. They join the same encrypted mesh network, and you can access the Control UI from anywhere at the Mac Mini's Tailscale IP.
🚀 How to Install OpenClaw
There are quite a few methods of installing OpenClaw on a Mac, so let's start by covering them.
How to Install Open Claw On a Mac
Method 1: Installer Script (Recommended for CLI Users)
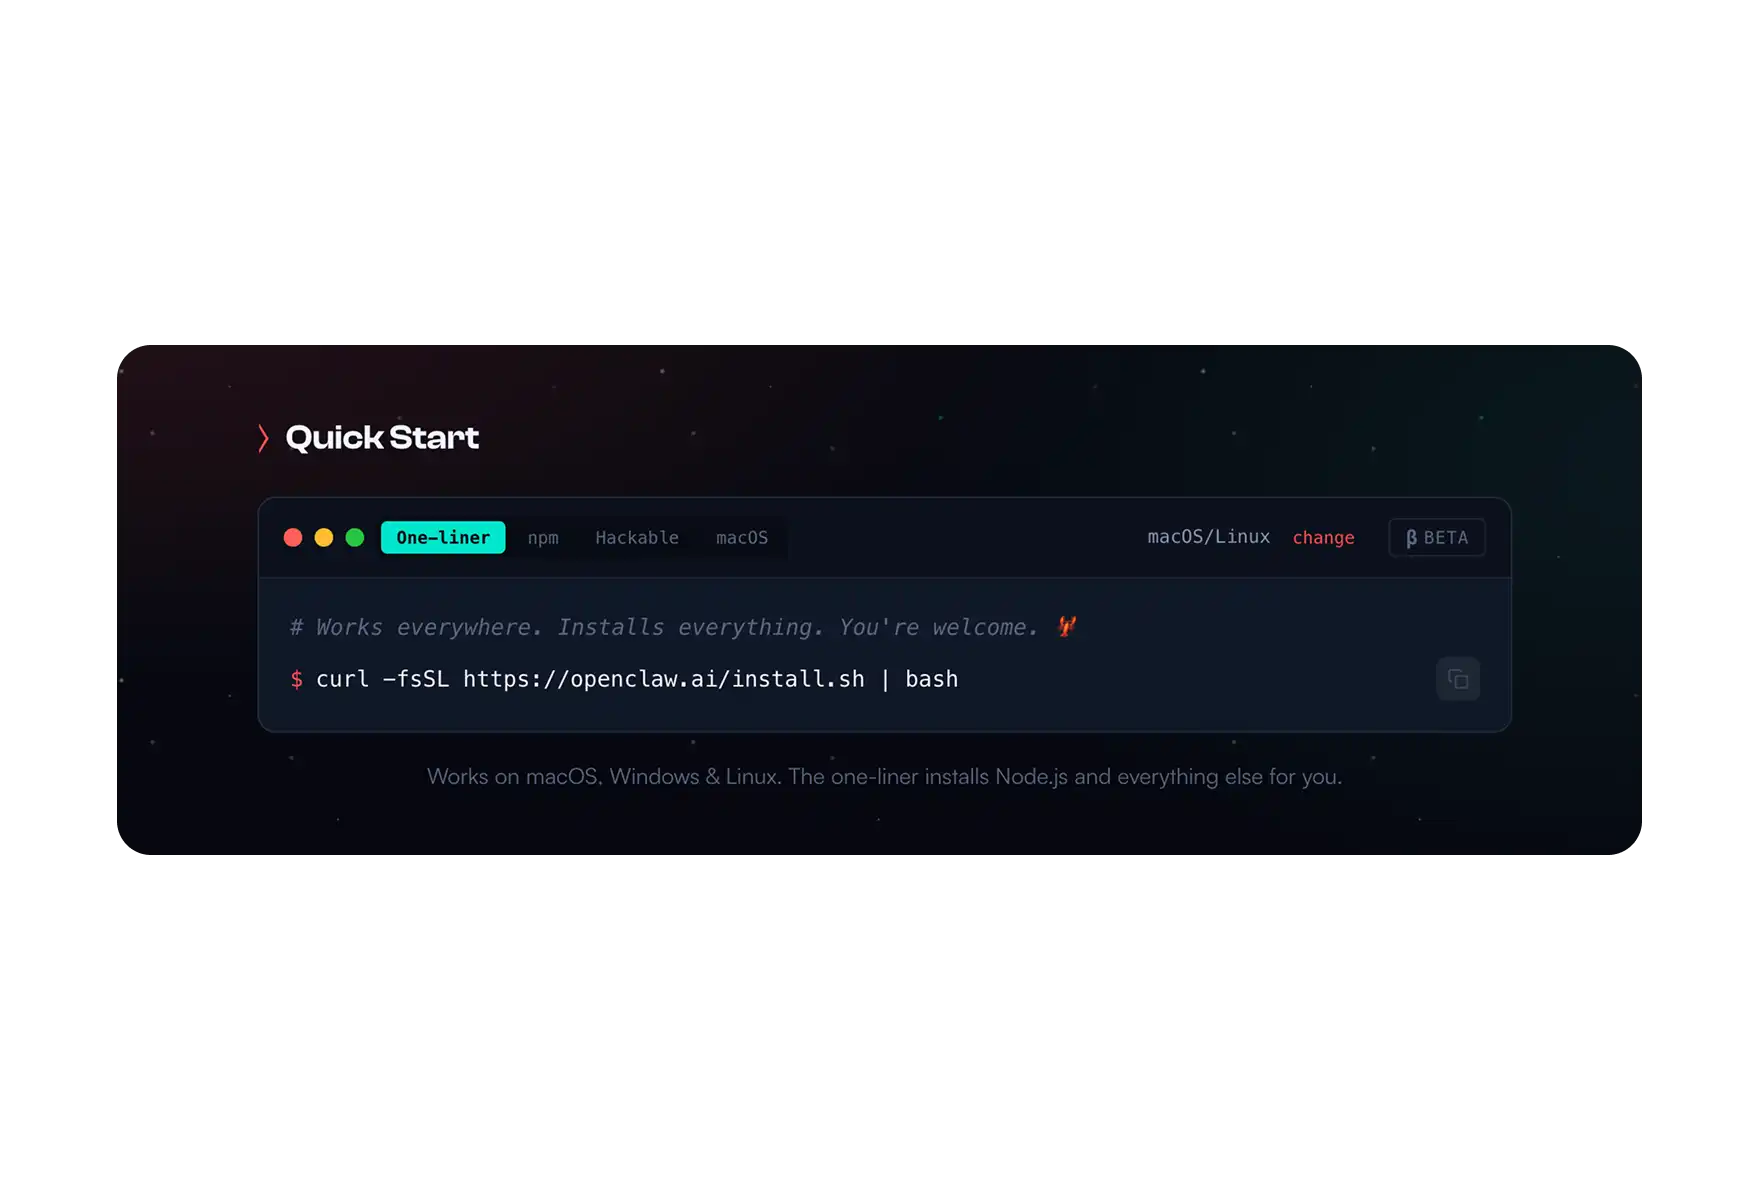
This is the simplest CLI path. The script checks your environment, installs Node.js if it's missing, and launches the onboarding wizard once everything is in place.
Open Terminal and run:
bashcurl -fsSL https://openclaw.ai/install.shOnce the script finishes, start the onboarding wizard:
bashopenclaw onboard --install-daemonThe --install-daemon flag tells the wizard to also create a launchd service, which means OpenClaw will start automatically whenever your Mac boots up. Without this flag, you'd need to manually start the gateway each time with openclaw gateway start.
This method works for most people who are comfortable in Terminal. The sections below cover alternative approaches if you need more control.
Method 2: npm / pnpm (Manual Install)
If you already have Node 22+ installed and prefer to manage your global packages yourself, you can install OpenClaw directly through npm or pnpm.
With npm:
npm install -g openclaw@latest
openclaw onboard --install-daemon
With pnpm:
bashpnpm add -g openclaw@latest
pnpm approve-builds -g
openclaw onboard --install-daemon
The pnpm approve-builds step is required because OpenClaw includes native modules (openclaw, node-llama-cpp, and sharp) that need to be compiled during installation. If you skip this step, the build will fail with permission errors.
Getting Sharp build errors? If you have libvips installed globally through Homebrew (which is common on Macs), the Sharp image library may try to link against it and fail. You can force it to use prebuilt binaries instead:
SHARP_IGNORE_GLOBAL_LIBVIPS=1 npm install -g openclaw@latestMethod 3: From Source (For Contributors)
If you want to modify OpenClaw's code, contribute to the project, or build a custom version:
bashgit clone https://github.com/openclaw/openclaw.git
cd openclaw
pnpm install
pnpm ui:build
pnpm build
pnpm link --global
openclaw onboard --install-daemon
This clones the full repository and builds from source, then links the CLI globally so you can run openclaw commands from anywhere. Useful if you're developing custom skills or want to test changes before they're released.
This clones the full repository and builds from source, then links the CLI globally so you can run openclaw commands from anywhere. Useful if you're developing custom skills or want to test changes before they're released.
Method 4: Docker (Best Isolation)
If you want to keep OpenClaw completely isolated from the rest of your system, Docker is the best option. This is especially relevant if you plan to run third-party skills that execute arbitrary code — Docker sandboxes them so they can't touch anything outside the container.
bashgit clone https://github.com/openclaw/openclaw
cd openclaw
./docker-setup.sh
docker compose up -d
To verify that everything started correctly:
bashdocker compose run --rm openclaw-cli statusThe Docker setup mounts your config and workspace directories from the host machine into the container, so your agent data, memories, and skill configurations persist even when you stop and restart the containers.
⚙️ Onboarding & Configuration
Regardless of which installation method you chose, the next step is the onboarding wizard. It runs automatically with the installer script, or you can trigger it manually with openclaw onboard.
Here's what each setting means and what to pick.
- Workspace Location — this is where OpenClaw stores all of its data: agent configurations, conversation memories, skill files, and logs. The default is ~/.openclaw, and there's rarely a reason to change it.
- AI Provider — you'll pick which AI model OpenClaw should use for generating responses. Anthropic's Claude is the strongest option for production use. Google's Gemini has a free tier that works well for experimenting before you commit to a paid API.
- Gateway Bind — this determines which network interfaces the OpenClaw gateway listens on. "Loopback" means only processes running on your Mac can connect to it, which is the safest option for personal use. "LAN" allows other devices on your local network to reach it.
- Daemon Install — if you say yes, the wizard creates a launchd service that starts OpenClaw automatically when your Mac boots. If you say no, you'll need to remember to run openclaw gateway start manually whenever you want to use it.
- Remote Access — this enables TUI (terminal UI) access from other machines over the network. Leave it disabled unless you have a specific reason to manage OpenClaw from a different computer.
Once onboarding is done, run these three commands to make sure everything
bashopenclaw doctor     # scans for common config problems
openclaw status     # shows whether the gateway is running
openclaw dashboard  # opens the web-based management UI in your browser
If all three come back without errors, your setup is complete.
📱 Connecting Channels
At this point OpenClaw is installed and running, but it doesn't have a way to communicate with you yet. The next step is to connect it to a messaging platform.
Telegram (Easiest Starting Point)
Telegram is the fastest channel to set up because it has a straightforward bot API with no approval process.
- Open Telegram and search for @BotFather — this is Telegram's official tool for creating bots
- Follow the prompts to create a new bot and copy the token it gives you
- Back in Terminal, enable the Telegram plugin and restart the gateway:
openclaw plugins enable telegram
openclaw gateway restart
Add the bot token to your workspace config file
Open your new bot in Telegram and send it a message — if everything is connected, it will respond
From this point on, you can interact with your OpenClaw agent directly through Telegram on your phone or desktop.
bashopenclaw plugins enable whatsapp
openclaw gateway restart
openclaw channels login
The channels login command generates a QR code in your terminal. Scan it with the WhatsApp app on your phone to link the session. If you're planning to use this in production, it's worth dedicating a separate phone number to keep your personal WhatsApp account separate.
Discord
Go to the Discord Developer Portal and create a new application.
Add a bot to the application, copy the token, and use the OAuth2 URL generator to invite the bot to your server.
Enable the Discord plugin in OpenClaw:
bashopenclaw plugins enable discord
openclaw gateway restart
You'll also need to add the bot token and your server's guild ID to the OpenClaw config file.
Email (SMTP)
OpenClaw can send and receive emails through SMTP. Set your mail server credentials as environment variables so OpenClaw can pick them up:
bashexport SMTP_HOST=smtp.gmail.com
export SMTP_PORT=587
export SMTP_USER=your@gmail.com
export SMTP_PASS=your-app-password
If you're using Gmail, you'll need to generate an App Password in your Google Account settings — your regular Gmail password won't work here because of Google's security restrictions.
🔒 Security Hardening
OpenClaw agents can access your email, calendar, files, and any other service you connect through skills. That makes security configuration important, especially if you're running it on a machine that's connected to the internet.
Loopback binding is enabled by default, which means the gateway only accepts connections from your own machine. If you change this to allow LAN or remote access, make sure you understand that anyone who can reach port 18789 on your network can interact with your agent.
API keys should be stored in environment variables, not pasted directly into config files. Config files can end up in backups, git repos, or crash logs — environment variables are harder to accidentally leak.
Docker sandboxing is worth enabling if you're running any skills you didn't write yourself. When sandboxing is active, skill code executes inside a container and can't access your host filesystem or network directly. Enable it in your workspace config:
{
  "sandbox": {
    "enabled": true,
    "provider": "docker"
  }
}
- Updates — run openclaw update at least once a week. OpenClaw is actively developed and security patches ship regularly.
- Backups — your entire OpenClaw setup lives in ~/.openclaw. Backing up that directory is all you need to restore everything on a new machine.
If you've opened the gateway to your local network, add firewall rules to restrict which IP ranges can connect:
bashsudo ufw deny 18789/tcp
sudo ufw allow from 192.168.1.0/24 to any port 18789
🔧 Troubleshooting
What do do if you’re seeing these errors:
openclaw command not found
This usually means your shell doesn't know where npm installed the global binary. Check the current state of things:
node -v
npm prefix -g
echo "$PATH"
Then add the npm global bin directory to your shell configuration:
bashecho 'export PATH="$(npm prefix -g)/bin:$PATH"' >> ~/.zshrc
source ~/.zshrc
Sharp Build Errors
If the Sharp image library fails to compile during installation, force it to download prebuilt binaries instead:
SHARP_IGNORE_GLOBAL_LIBVIPS=1 npm install -g openclaw@latestIf that still doesn't work, install the native build toolchain and try again:
npm install -g node-gypGateway Won't Start
Check the logs first to see what's actually going wrong:
bashopenclaw gateway logsIf the error mentions port 18789, another process may already be using it:
lsof -i :18789You can either stop whatever's using that port or change the gateway port in your OpenClaw config. Then restart:
openclaw gateway restart😎 Skip the: Set Up OpenClaw with Atomic Bot
Everything above works, but it assumes you're comfortable working in Terminal, managing Node.js, editing config files, and debugging errors when things don't go as planned. If that's not you — or if you just don't want to spend 15 minutes on something that should be simple — Atomic Bot exists specifically for this reason.
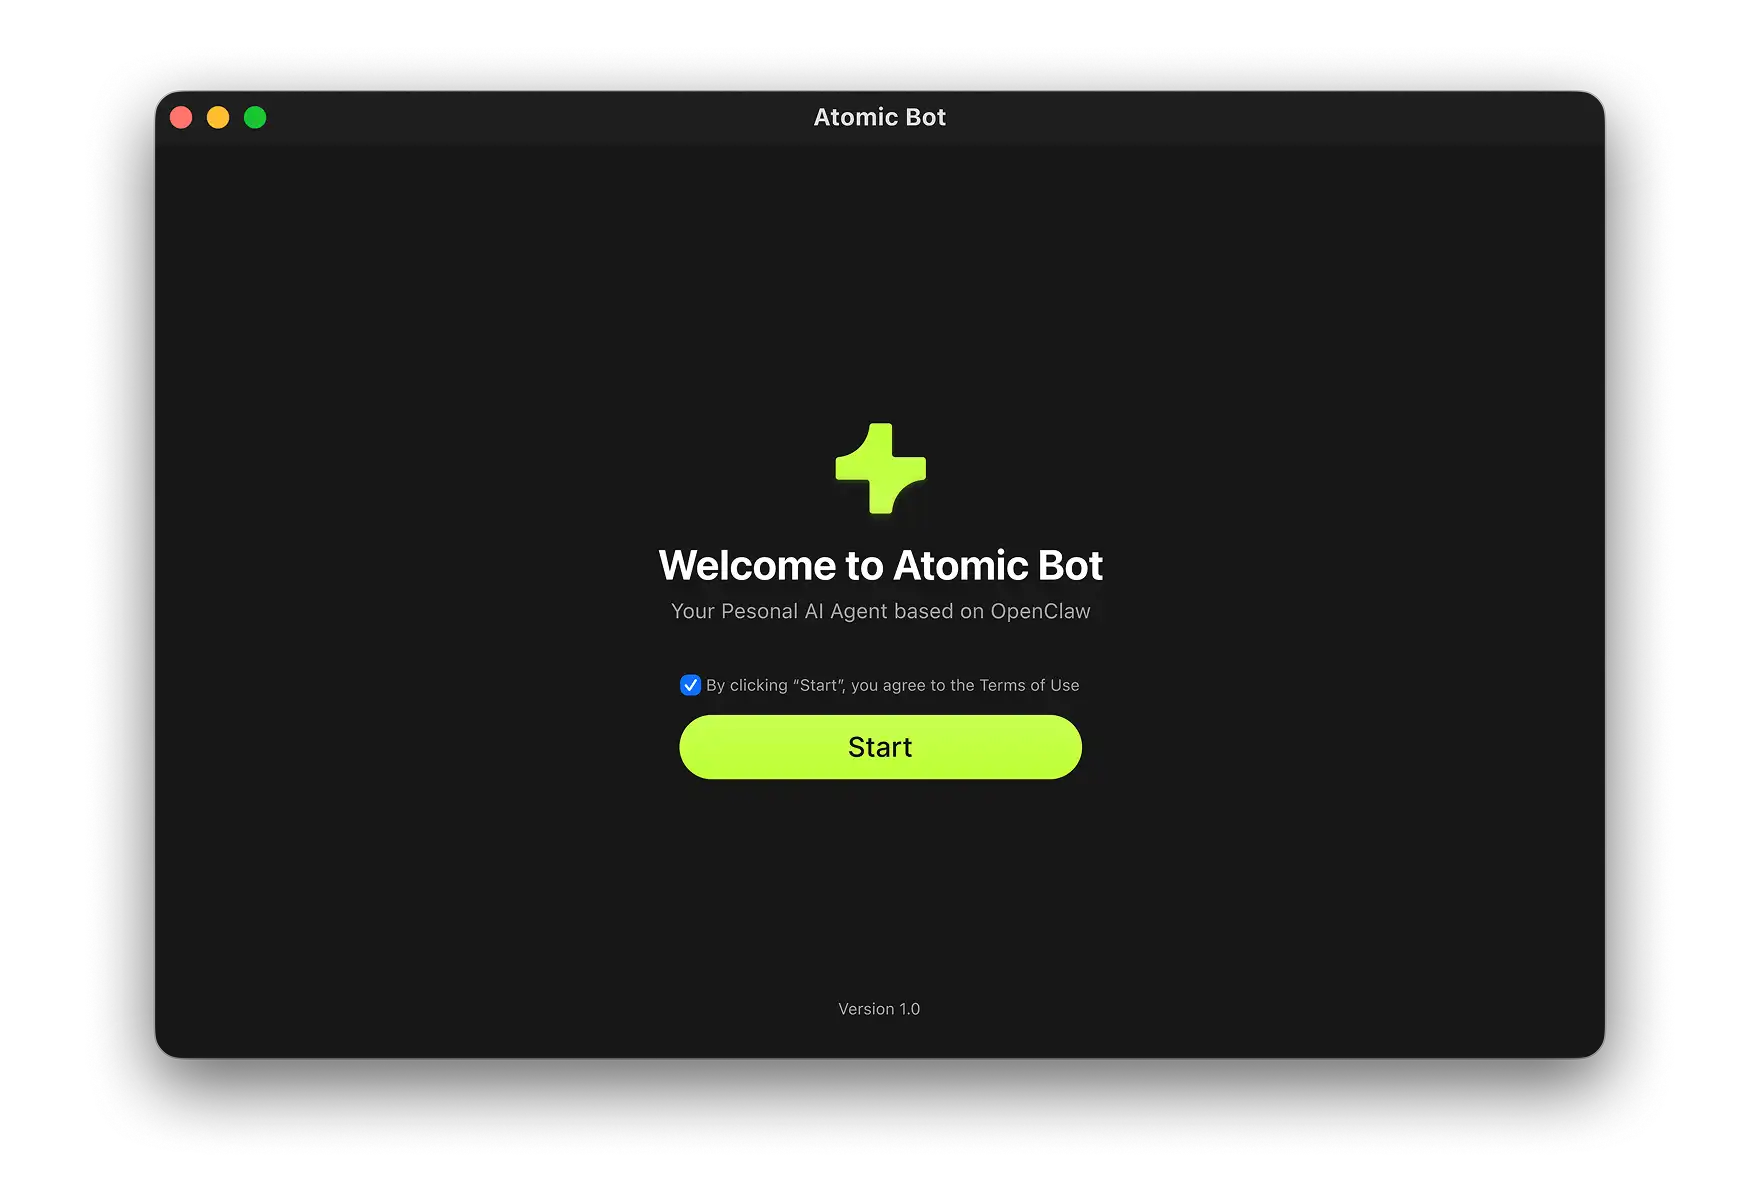
Atomic Bot is a native macOS application that packages the entire OpenClaw installation into a standard Mac app experience.
Here’s how to install OpenClaw with AtomicBot:
Step 1: Download Atomic Bot
- Go to atomicbot.ai
- Click Download App
- Open the .dmg file
- Drag Atomic Bot into your Applications folder
Step 2: Install OpenClaw
- Open Atomic Bot from Applications
- Click Install OpenClaw
- Follow on-screen instructions
- Done ✅
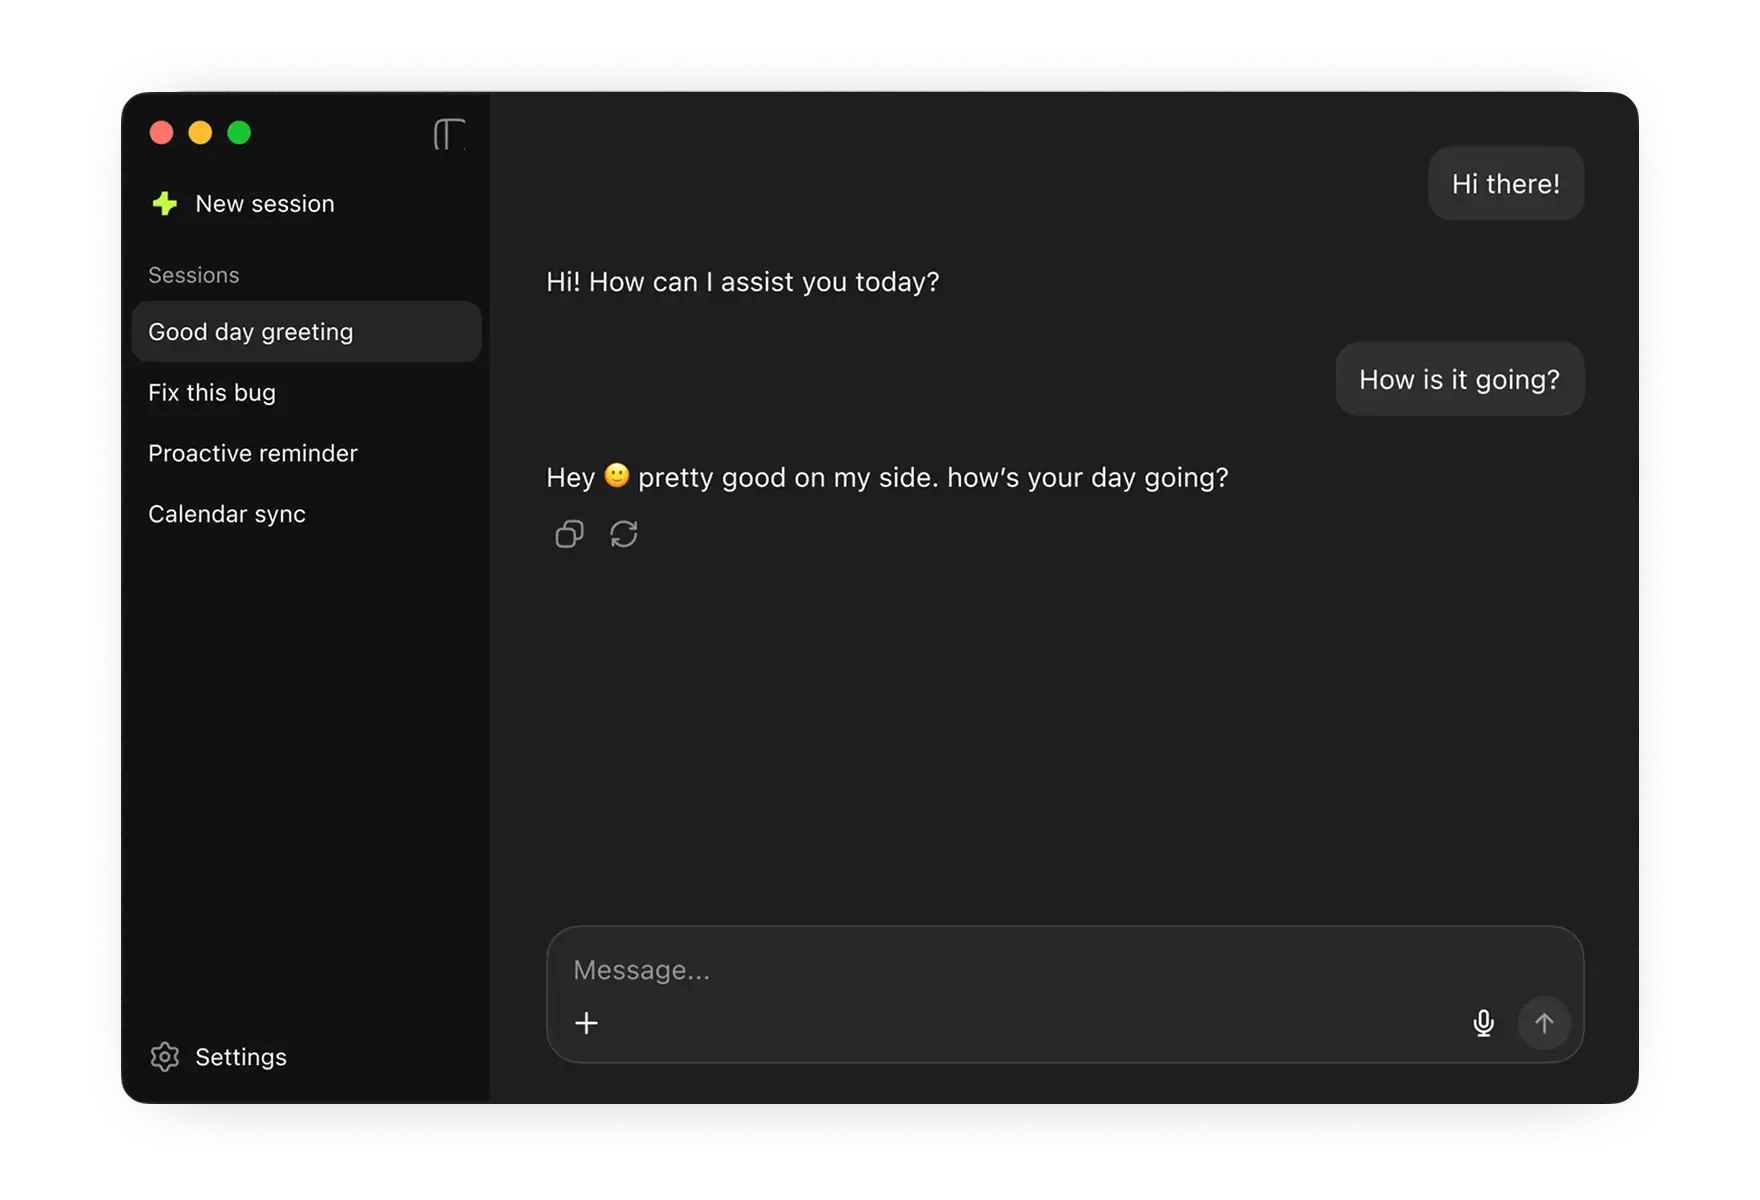
Step 4: Send Your First Message
Open the messaging app you just connected and send /start to your new agent. It will:
- Introduce itself
- Show you available commands
- Walk you through configuring which skills you want active (email, calendar, browser, files, weather, Google Sheets)
From here on out you're using OpenClaw through your regular messaging app. Atomic Bot stays in the background, handling updates and keeping the gateway running.
Both approaches result in the same thing — a fully functional OpenClaw agent running locally on your Mac. The difference is how much of the process you want to see and control. Get Atomic Bot →
The Easiest Way to Install OpenClaw on Windows
We could talk about how easy it is to set up Atomic Bot on Windows — but it’s easier to just show you. Here’s a quick walkthrough of the setup process. It only takes a few seconds to read.
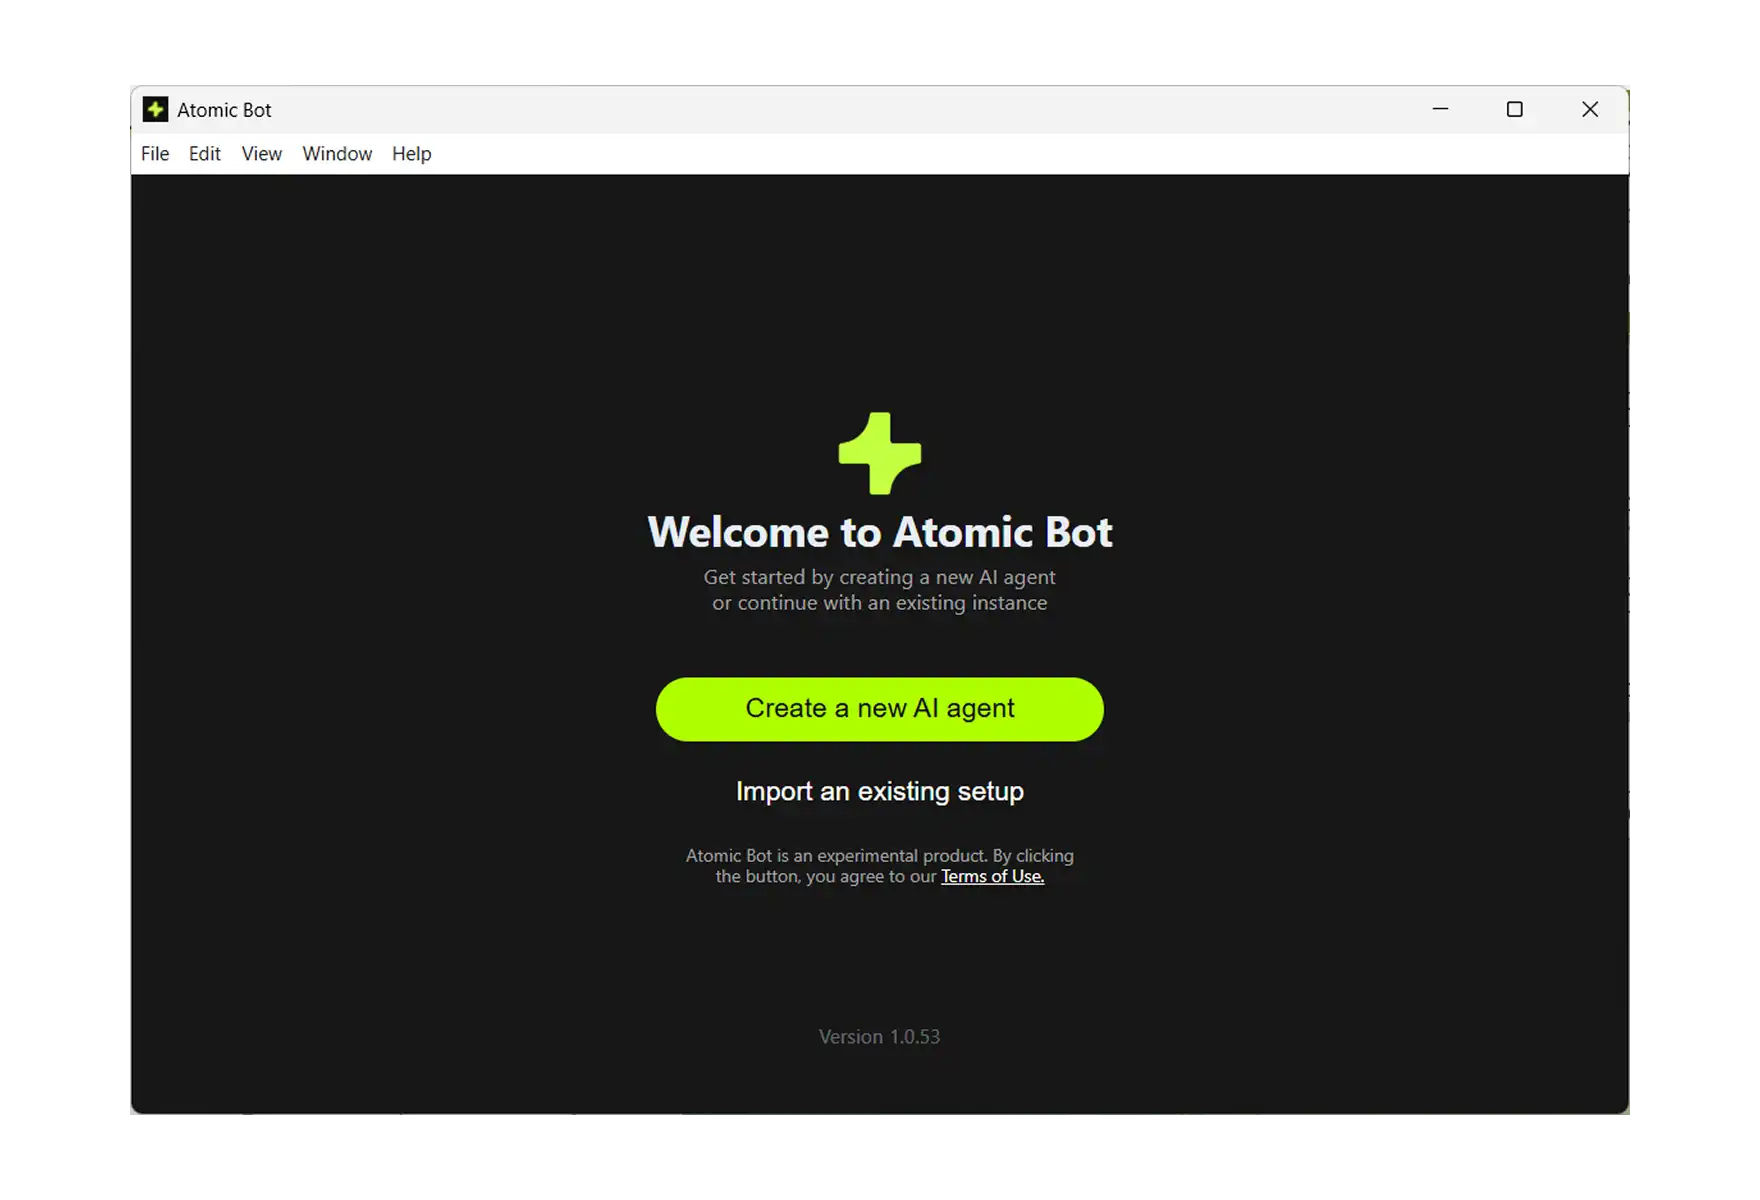
Step 1: Download and Launch
- Go to atomicbot.ai
- Download the Windows installer
- Run the .exe, install like any normal app
- Launch Atomic Bot
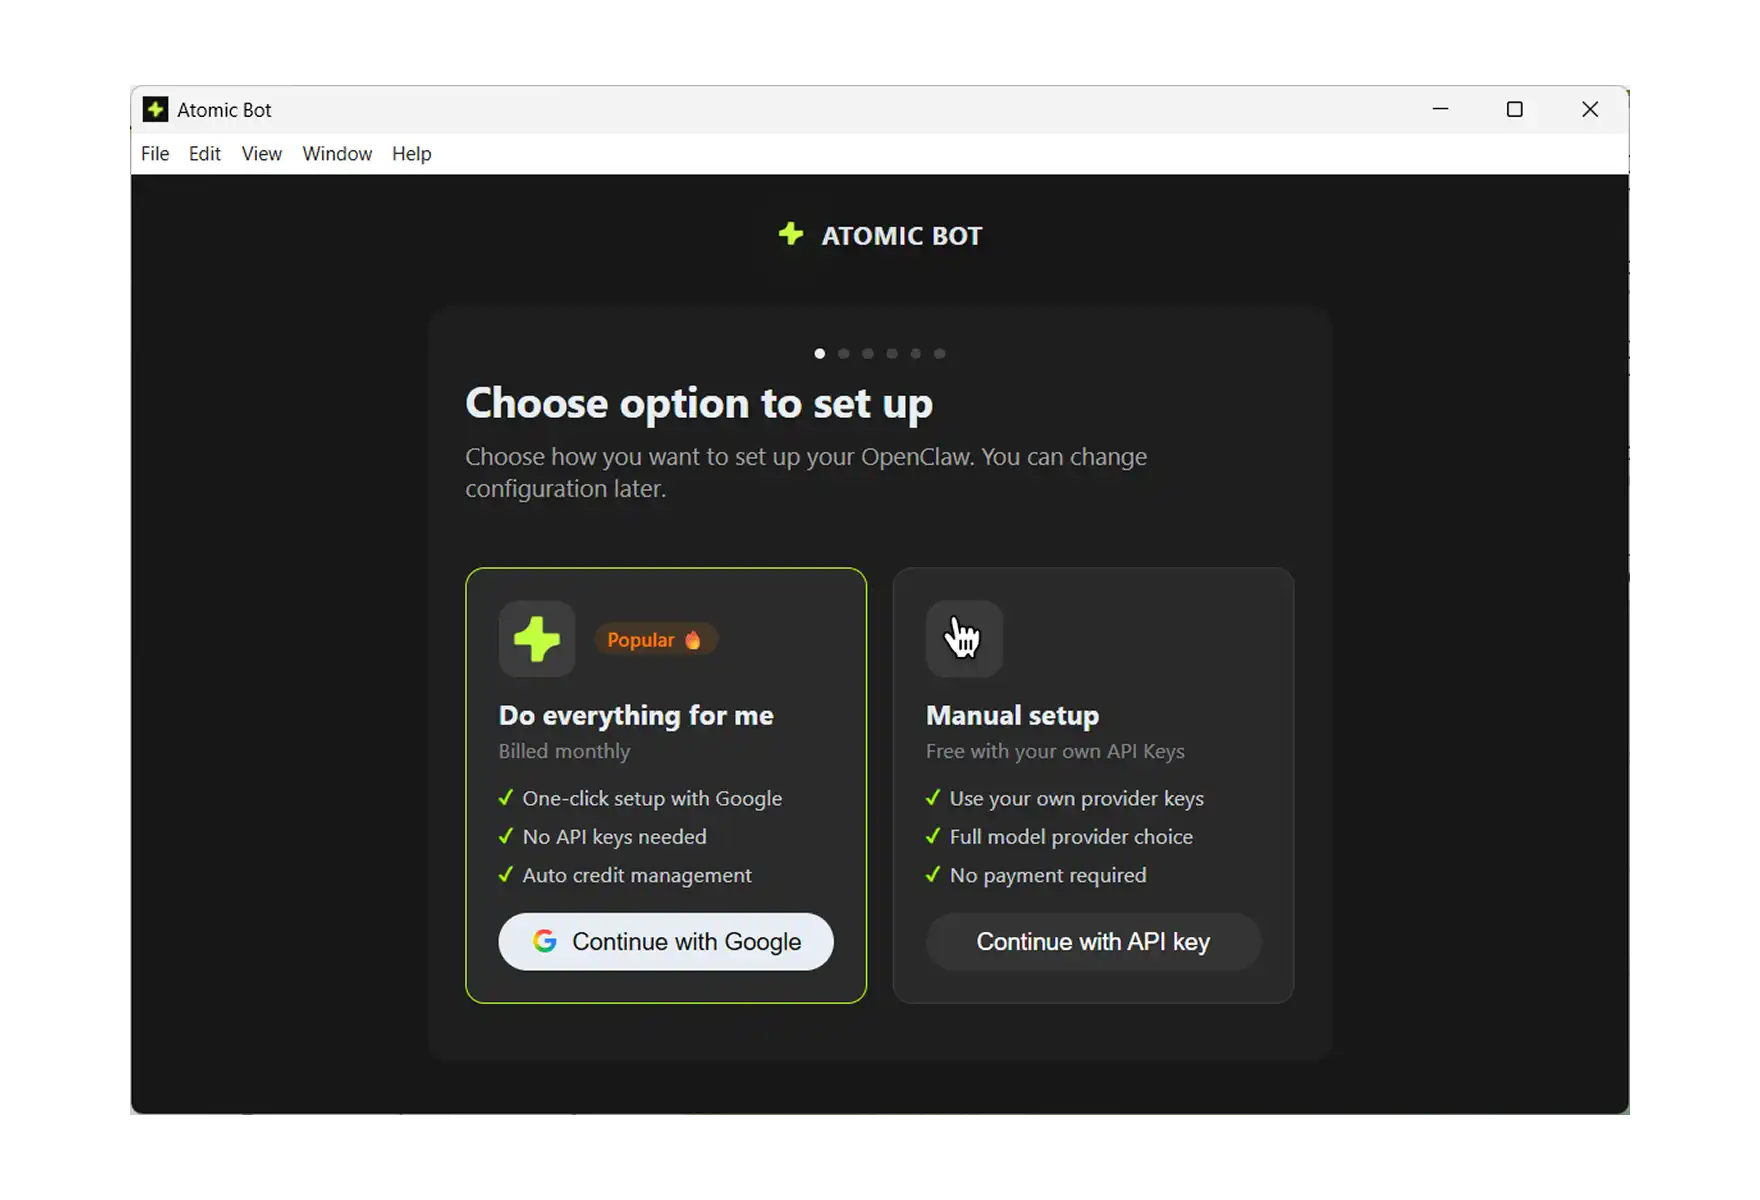
- Сhoose your OpenClaw setup option
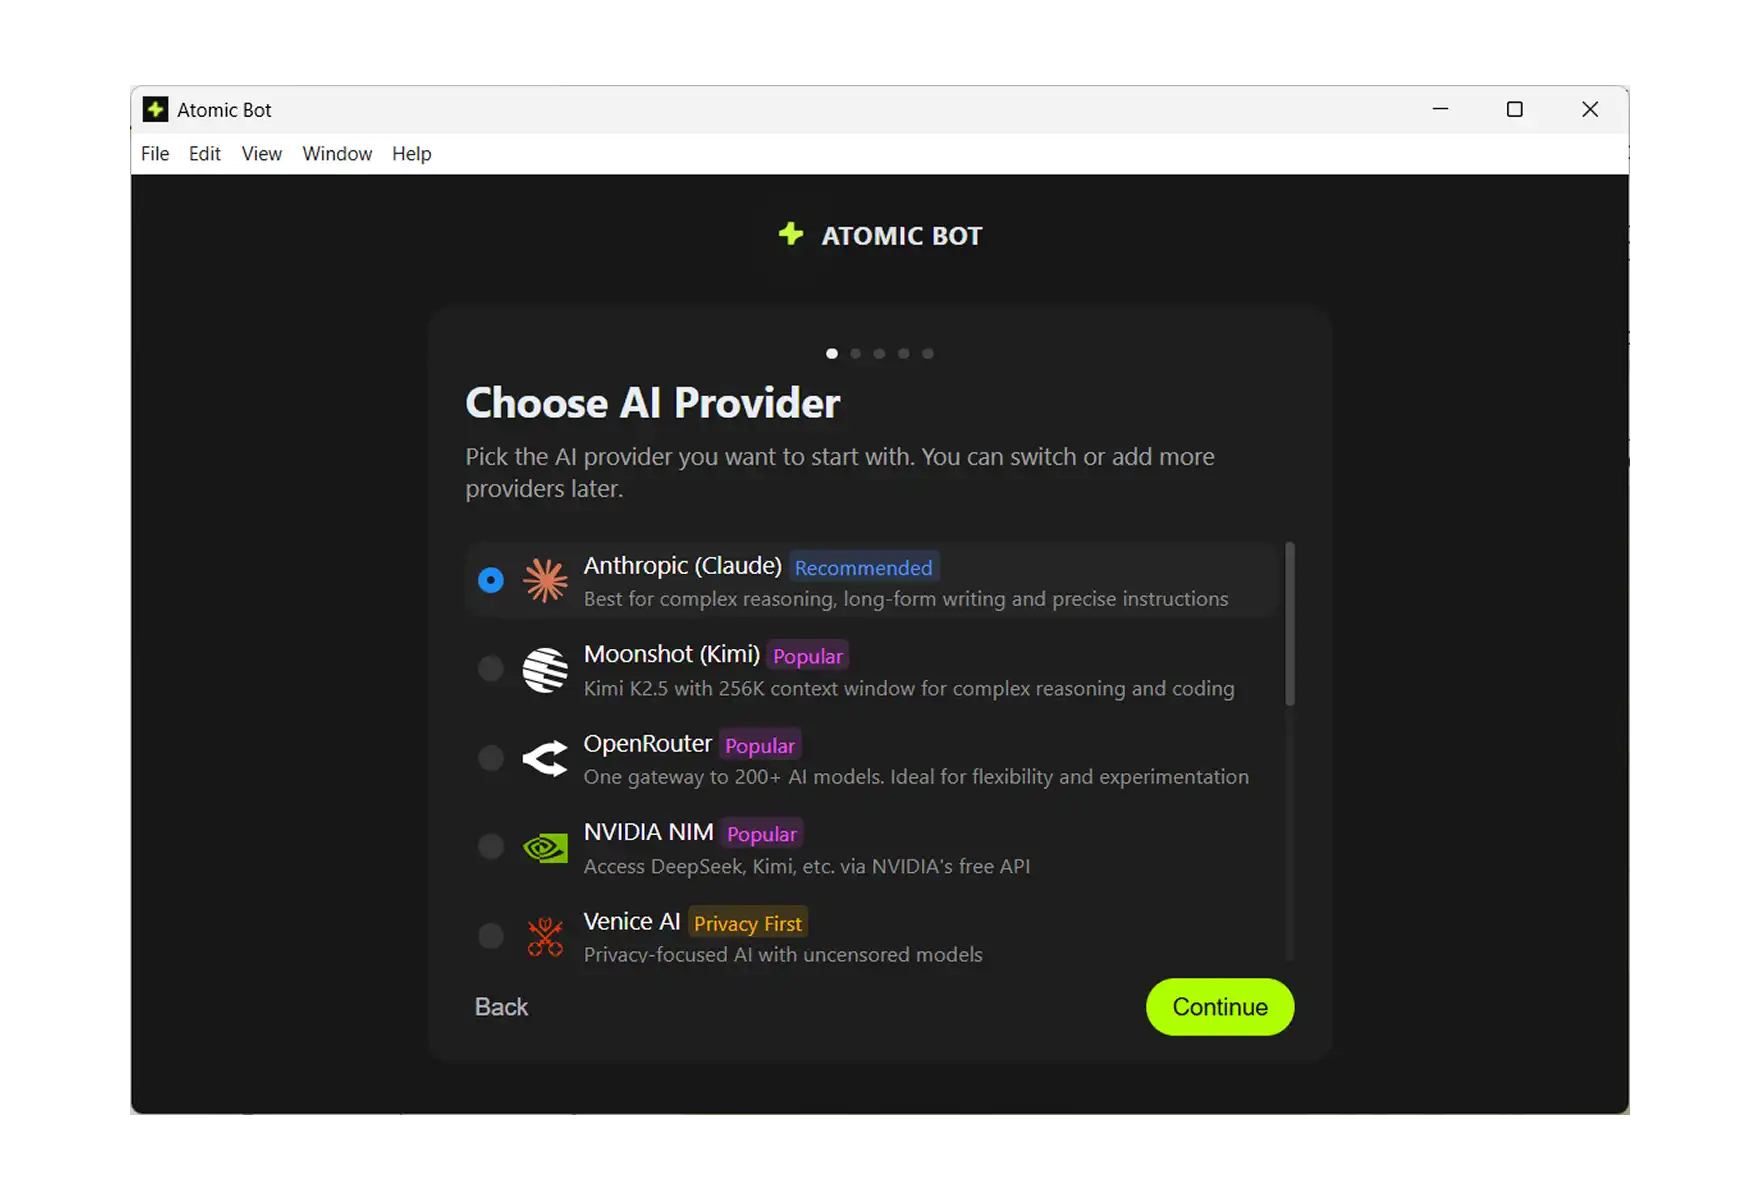
Step 2: Choose Your AI Provider
Atomic Bot supports multiple AI providers out of the box:
- Anthropic (Claude) — marked as Popular
- OpenAI (GPT)
- Google (Gemini)
- MiniMax
- Z.ai (GLM)
Pick the one you prefer. You can always change this later in settings.
.webp)
Step 3: Enter Your API Key
Atomic Bot will ask for your API key from the provider you selected. There's a direct link to get one — click Get API key and it takes you straight to the right page. Paste your key, hit Continue.

Step 4: Select Your AI Model
Now pick the specific model you want to power your assistant. For example, if you chose OpenAI, you'll see options like:
- GPT-5.2 Pro (Fast)
- GPT-5.2 (Pro)
- GPT-5.2 Mini (Ultra)
- Codex
- GPT-4.5
Each shows context window size and capabilities. Just pick one — you can always change this later.
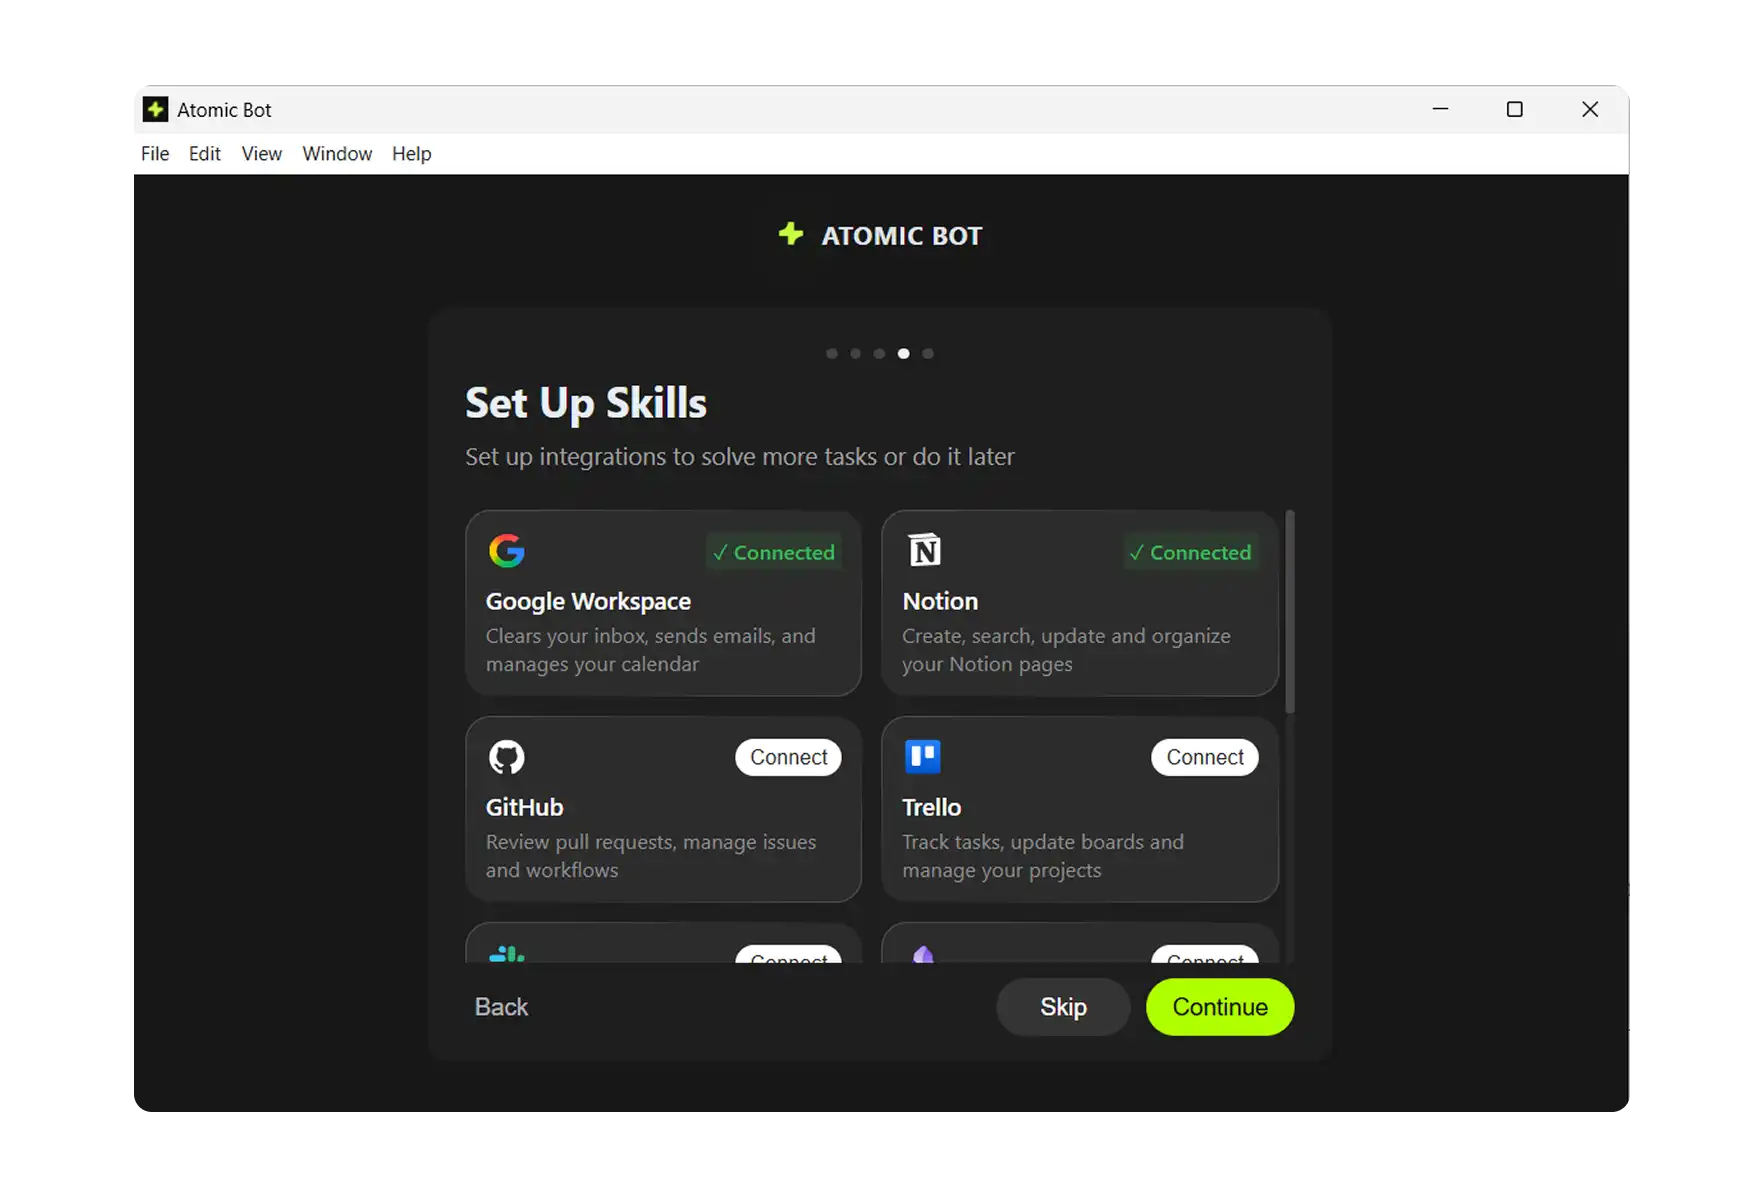
Step 5: Set Up Skills
This is where it gets fun. Skills are integrations that let your AI actually do things:
- Google Workspace — inbox, emails, calendar
- Notion — notes, docs, knowledge base
- Trello — task boards, project management
- Gemini — multimodal AI capabilities
- Nano Banana — image generation
- And more coming soon
Connect what you need, skip what you don't. You can always add more later.
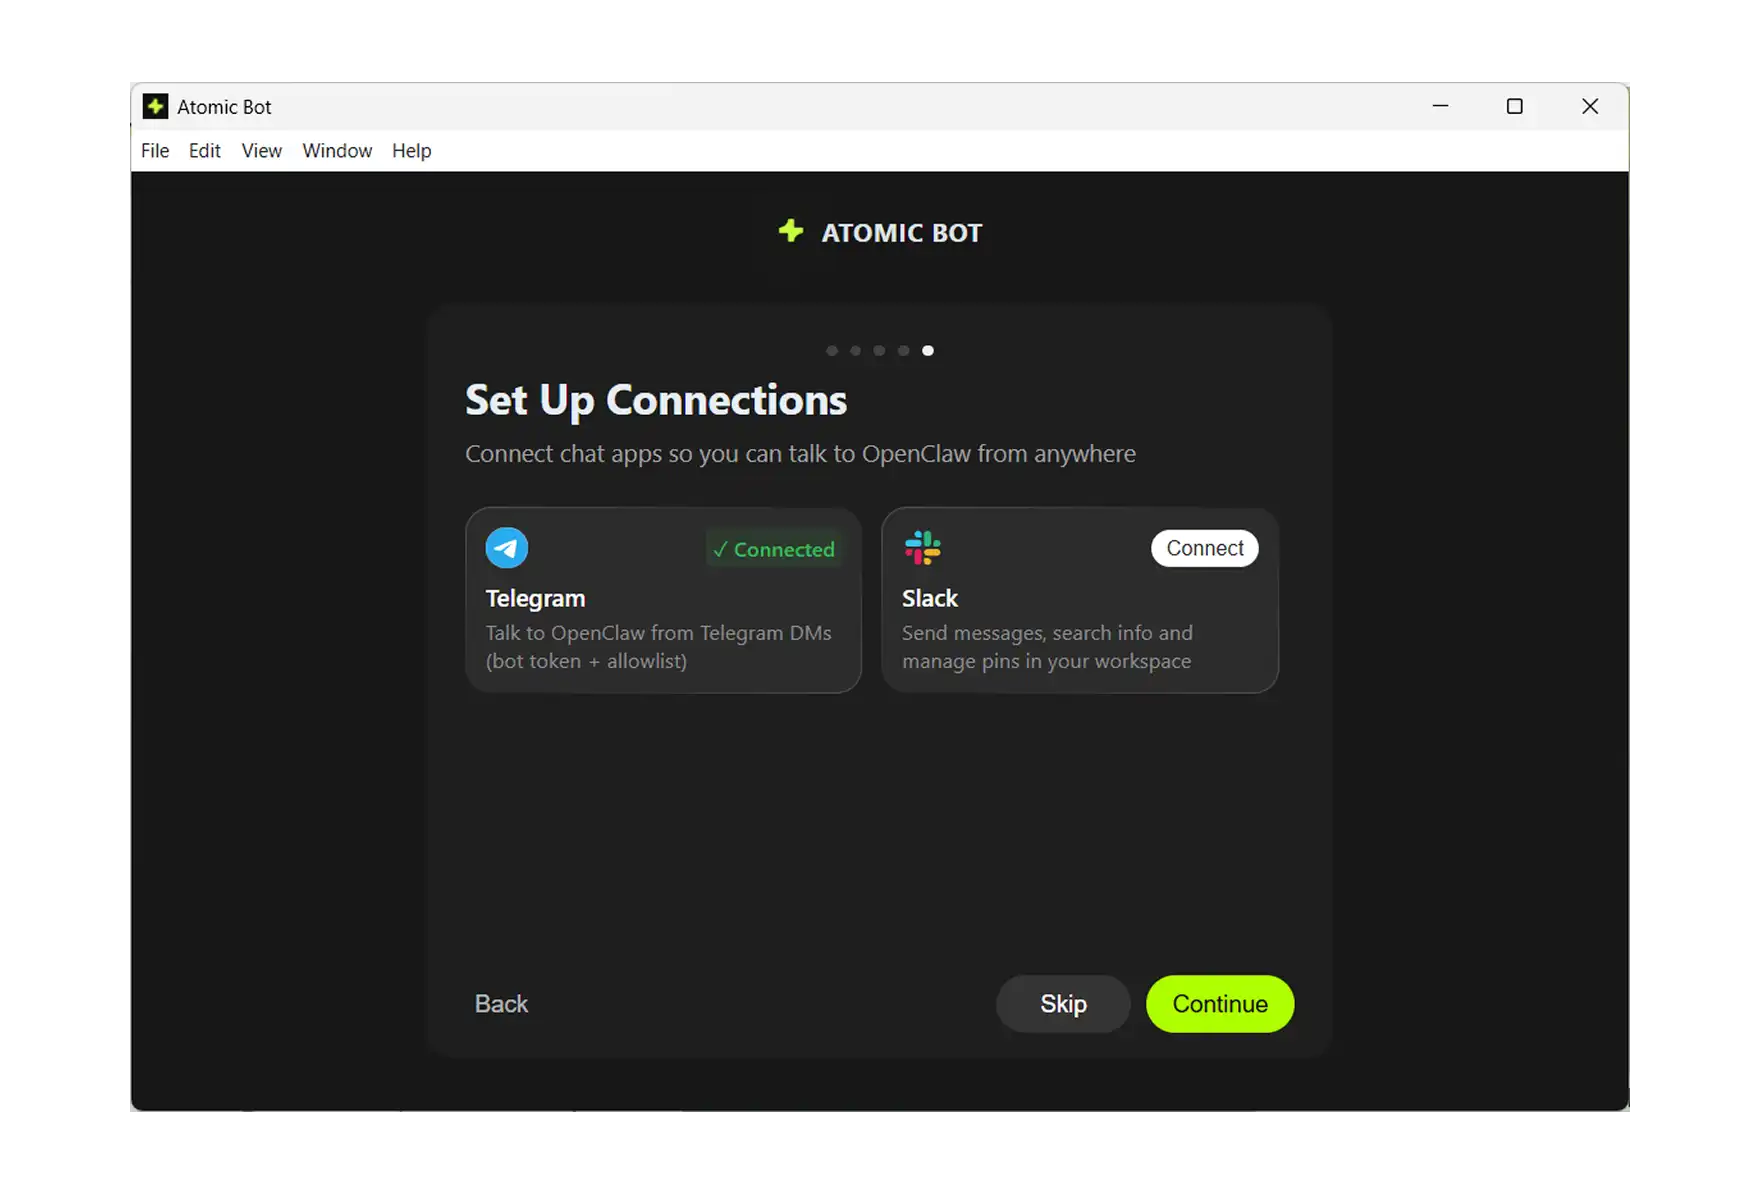
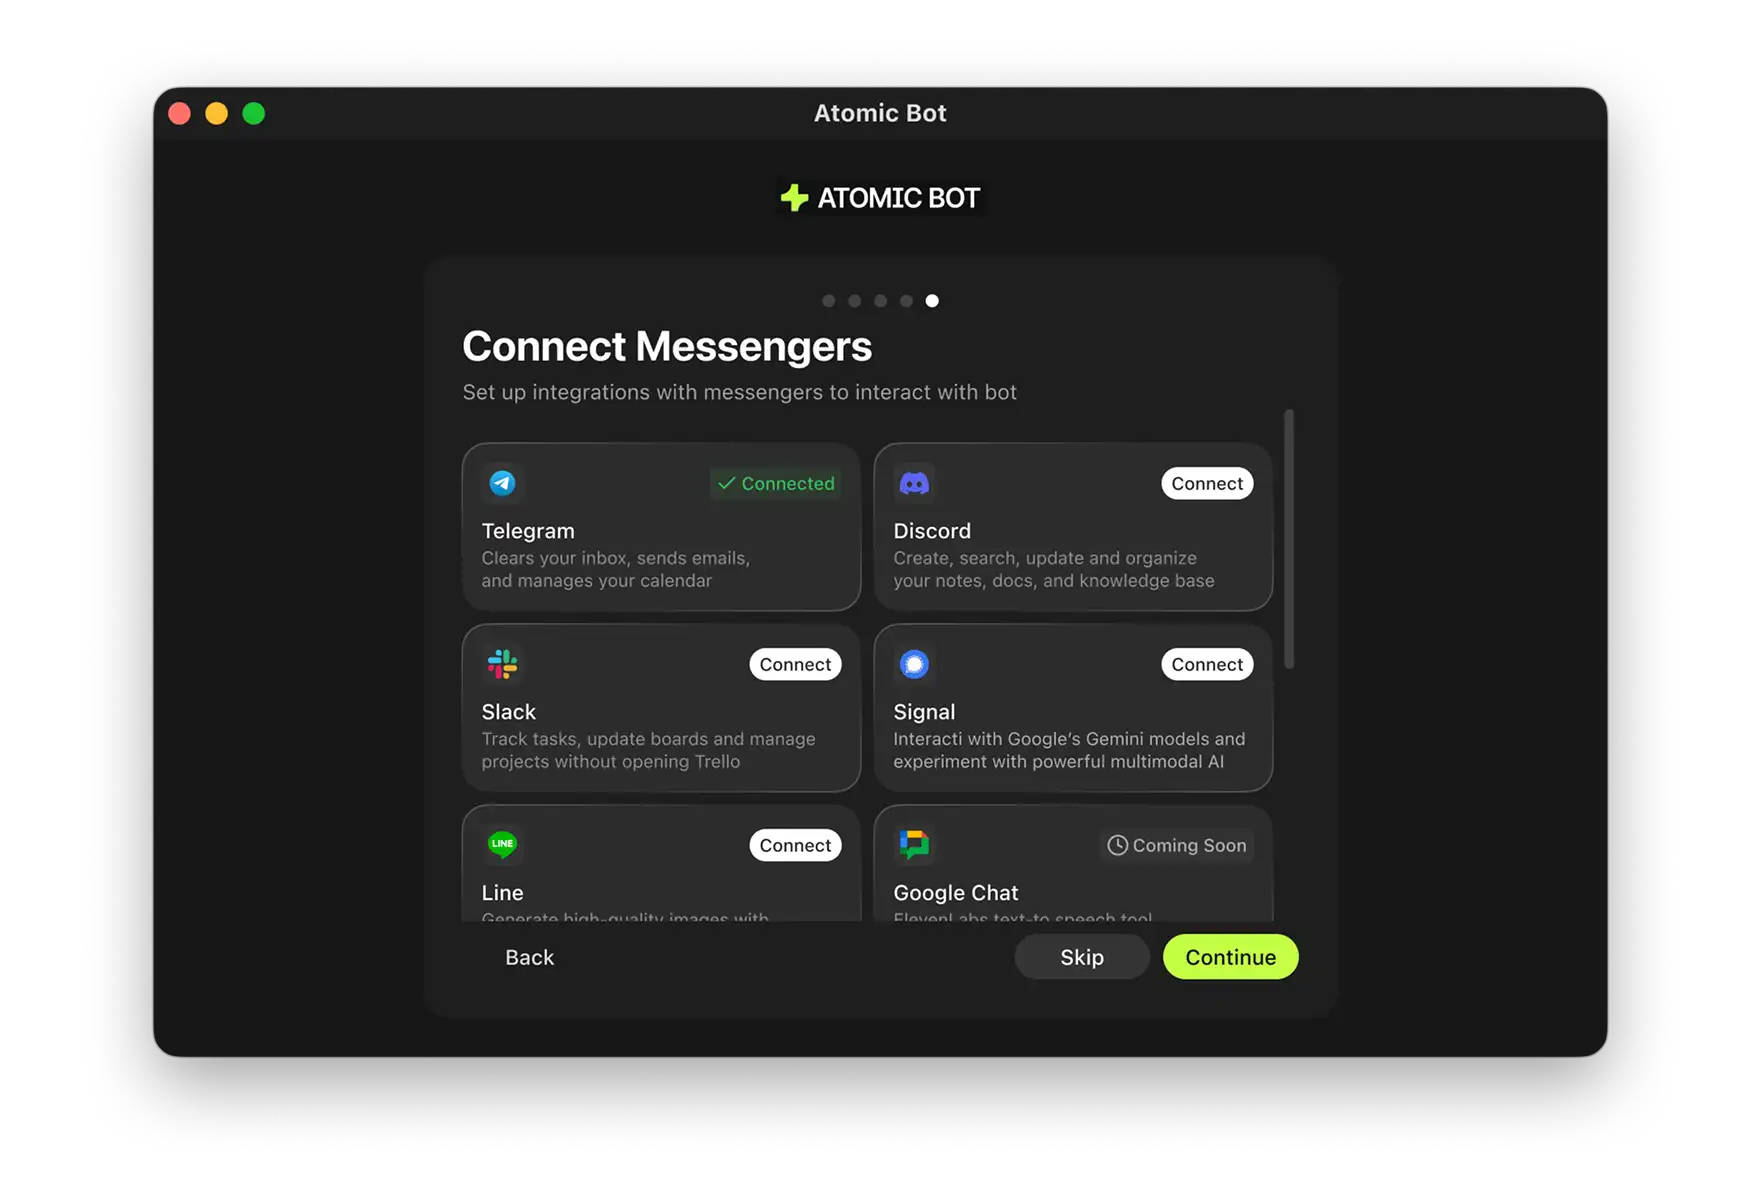
Step 6: Connect Your Messenger
Last step — choose how you want to talk to your AI:
- Telegram (most popular)
- Discord
- Slack
- Signal
- Line
- Google Chat (coming soon)
Pick one, authorize it, and you're done.
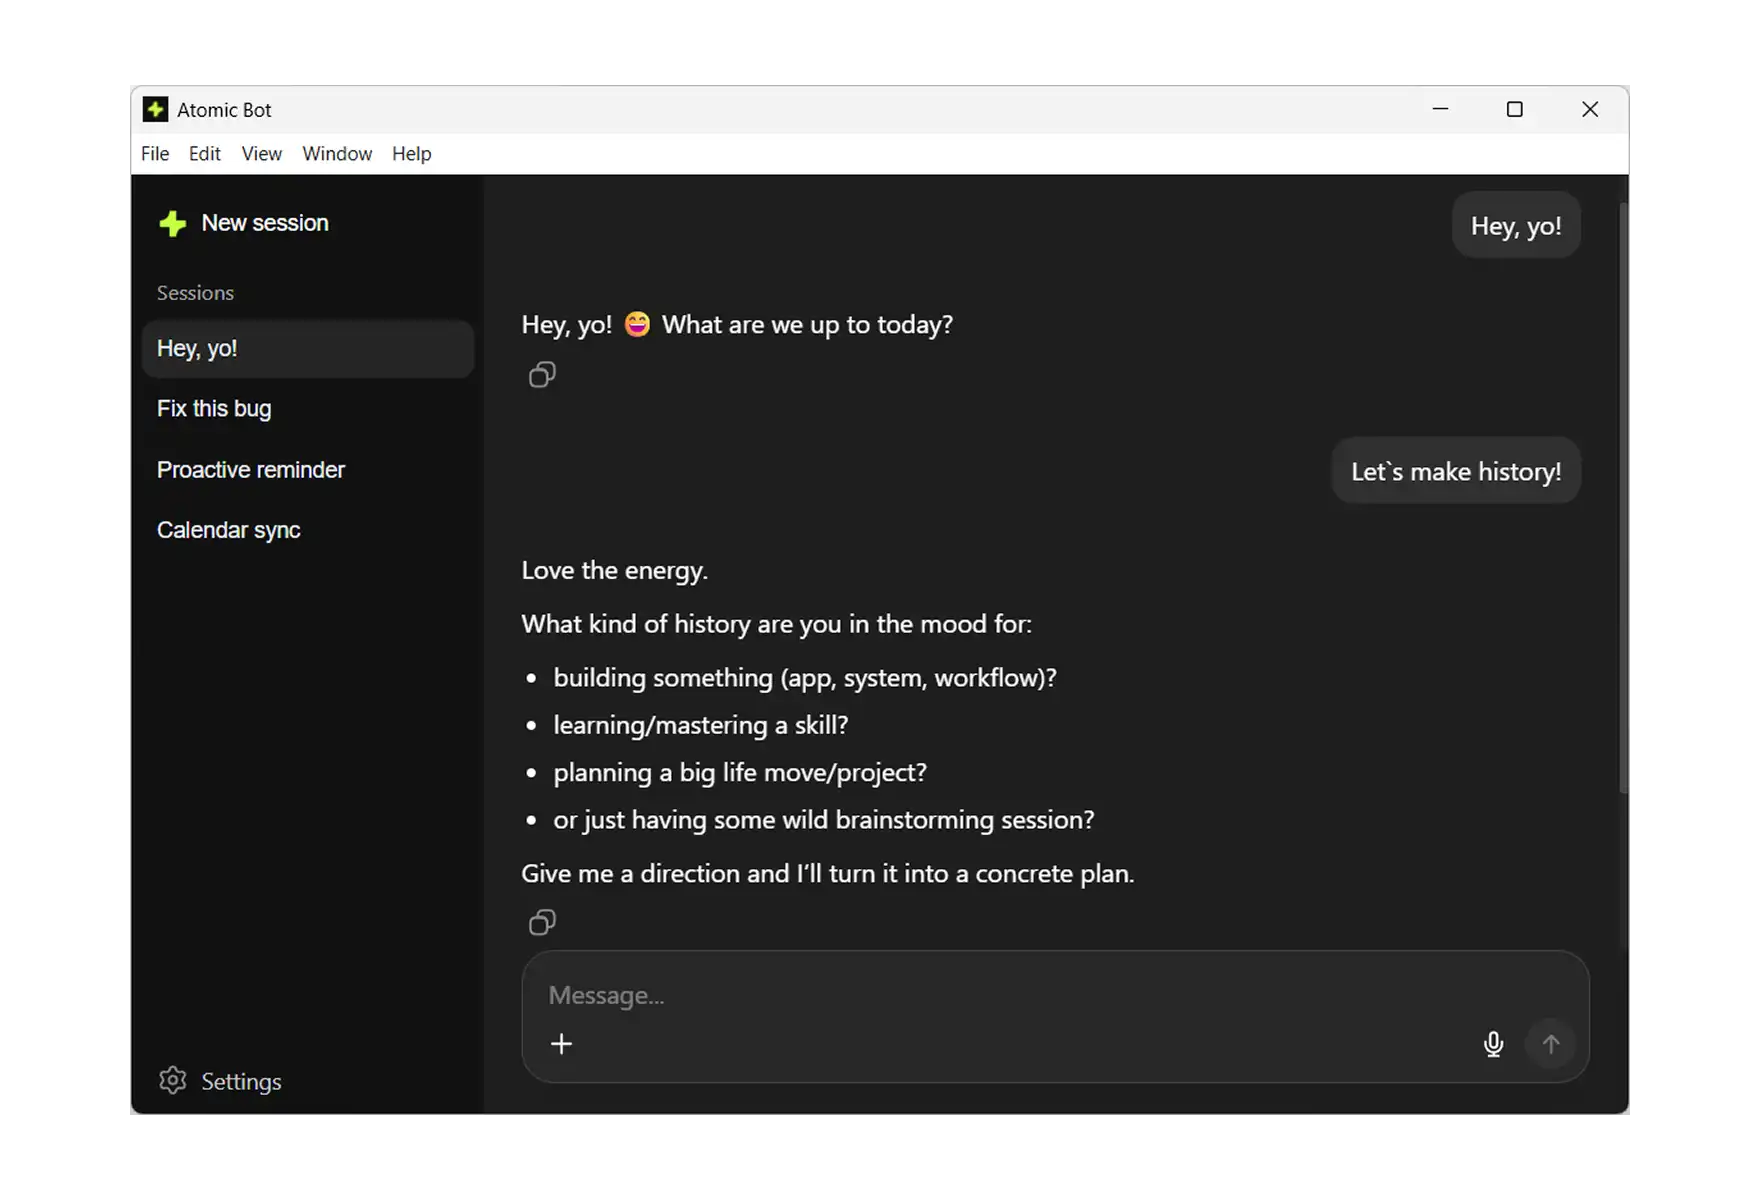
That's It. You're Running OpenClaw. Send a message to your bot. It will introduce itself, show available commands, and start learning about you.
📋 Post-Install: What to Do Next
Once OpenClaw is running — regardless of which method you used — there are a few things worth doing immediately.
Run openclaw doctor. This command scans for common configuration problems, missing dependencies, and security issues. Fixing things at this stage saves hours of debugging later.
Explore the official OpenClaw documentation. It covers advanced skill configuration, multi-agent setups, and security best practices. If you're planning to go beyond basic chat, the skills documentation is the next thing to read — it explains how to add capabilities like Gmail automation, Google Sheets integration, and browser control.
Set up Telegram if you haven't already. Of all the messaging channels OpenClaw supports, Telegram is the fastest to configure and the one the community uses most. If you followed the Atomic Bot path, channel setup was part of the wizard. If you used the CLI, the Connecting Channels section in the macOS guide above walks through it step by step.
Keep OpenClaw updated. The project ships new releases frequently — sometimes several times a week — and security patches land regularly. Run openclaw update periodically, or let Atomic Bot handle updates automatically in the background.
❓ FAQ
Is OpenClaw free?
Yes. OpenClaw is fully open-source and the software costs nothing. You pay only for AI provider API usage (Anthropic, Google, OpenAI) based on how much you use it, and for your own hardware or server costs if applicable.
What AI models does OpenClaw support?
Anthropic Claude 3.5 and 4.x (recommended for production), Google Gemini 2.0 and 2.5 (free tier available for experimentation), OpenAI GPT-4.x and GPT-5.x, and local models through Ollama or LM Studio. Local model support is improving rapidly but is still considered experimental for complex agent tasks.
Can I run OpenClaw on a VPS instead of my personal machine?
Yes. Providers like Atomic Bot, DigitalOcean, Hetzner, and Linode all work well. The recommended spec is 2 vCPU, 4 GB RAM, and 40 GB SSD running Ubuntu 22.04 LTS. Use the same installer script on a fresh OS — avoid third-party marketplace images, since they often come with unexpected configurations. Atomic Bot also supports deploying OpenClaw to the cloud directly from the app.
Can I run multiple agents?
Yes. Create separate directories under ~/.openclaw/agents/ — one for personal tasks, one for work, one for monitoring, or whatever separation makes sense. You switch between them using CLI commands or through your chat interface.
What's the difference between Atomic Bot and the CLI install?
Both result in the same OpenClaw agent running locally on your machine. Atomic Bot handles Node.js installation, dependency management, configuration, channel setup, and updates through a graphical interface. The CLI gives you direct control over every step but requires terminal familiarity. If you're not sure which to pick, start with Atomic Bot — you can always switch to CLI management later. For a broader comparison of automation tools in this space, see our best AI automation software roundup.
Is my data safe?
OpenClaw runs locally on your machine. Your credentials, conversation history, and files stay on your device. The AI model's responses come from the cloud (unless you're using Ollama), but OpenClaw itself doesn't send your data to any third-party servers. Atomic Bot doesn't access your conversations or files either.